How to Install a 009 (or any) VW Distributor
VW Distributor Installation How To
The first thing we need to do is put the engine in a firing position for #1 cylinder. You are either in one of two situations; your engine runs, and you need/want to replace it, or your engine does not have a distributor installed and you need to put one in.
We’ll start with an engine that does not have a distributor in it. Take the valve cover off the right side of the engine, which is the #1 and #2 side. # 1 is the cylinder on the right, towards the front of the car (on the flywheel end). Rotate the engine clockwise by hand until you see the exhaust valve open up. Continue rotating until you see the intake valve open, then close. NOW YOU ARE ON THE COMPRESSION STROKE. Look at your pulley, and continue rotating until the pulley notch is straight up, OR until the pulley’s woodruff key is in the 9 o’clock position. Now you are at TDC for #1, which is where you need to be to procede. If your engine already runs, you can simply remove the distributor cap, and rotate the engine until the rotor is pointing at the plug wire (in the cap) that runs to cylinder #1. Double check your pulley, and it should be notch up, or key at 9 o’clock, as in the previous description. You are now at TDC for #1.
*You can not just line up the pulley and go from there, because the VW engine is a 4 stroke engine, and the pistons come up TWICE for every firing stroke. So, if the notch is up, you could be at TDC for #1, but you could also be at TDC for #3! Be sure you have it right.*
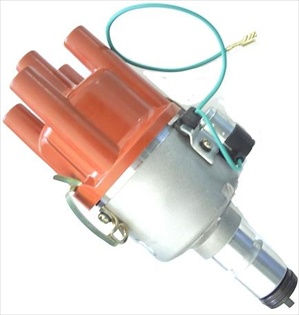
Remove the [volusion link=”IGD0001″ target=”blank”]distributor[/volusion] and distributor clamp. Slide the distributor clamp onto your new distributor. Now, install the distributor o-ring onto the distributor (if you put the o-ring on before the clamp, you will find out why I’m telling you to put the clamp on first! 🙂 )
Look into the distributor hole in the engine, and see how the drive notch is lined up. This lets you get the new distributor’s drive close as you put it in. Oil up the distributor shaft and o-ring area (you don’t want to tear the o-ring up). Put it in. It may take some light tapping on the rim of the distributor to get the o-ring started into the case. Slide it all the way down, and it should bottom out on the clamp. If it does not, the drive gear is not properly engauged. You need to rotate the rotor back and forth while GENTLY pushing the distributor down. When you find the slot, it will drop the rest of the way.
The rotor SHOULD be pointing to the little notch in the distributor body, which is the marking for #1 cylinder firing position. If it isn’t, you are either NOT at TDC for #1, or your distributor drive pinion is indexed wrong, and needs to be removed and rotated to the proper position.
If you are re-using your distributor cap, CHECK that the rotor is aiming towards the #1 plug wire (remember, we are at #1 TDC). If not, remove the wires from the cap, and rotate them to the proper position, so that #1 is now the wire the rotor is aiming at.
Time the engine as normal, either static or running. 009s can be at 30 degrees BTDC at 3500 RPMs or higher, OR at about 5 degrees BTDC at idle, they are equivalent. Hope this helps!
So – that’s it! Let me know if this article has been a help you…and, of course, when you decide to order, please consider Aircooled.Net!