How To Rebuild Weber 48 IDA Carburetors for your VW
 The Weber 48 IDA has been used for decades by VW enthusiasts whose goal it is to squeeze every ounce of performance out of their engine. Problem is, production of these coveted Webers was halted many years ago. These excellent VW carburetors in decent condition have become rather scarce! Typically VW performance engine fanatics have to resort to scrounging the swap meets to find a pair of 48’s and even then, they may not be lucky enough to find a pair but have to acquire them one at a time. But if you are lucky enough to acquire a set in usable condition, and you are willing put the time, money and energy into rebuilding and tuning them, you WILL be rewarded. The Weber IDA’s sheer size will likely result in gasps of awe and astonishment from those that have never seen them before!
Getting Ready to Rebuild
No matter where you find your 48s, they are almost always in need of some TLC. Many need a full rebuild, and some may also need repair if they have sustained damage during the course of their long life in use. In this guide, we attempt to outline what is required to rescue the beloved 48 IDA, and to restore them to their former glory so that you can use them on your VW safely and reliably. After reading this article carefully, you still may not feel that you are up to the task of your 48 rebuild for lack of skill, tools, or confidence. If this is true in your case, then we recommend that you send your 48 IDA’s to a carburetor rebuilder (recommendations provided at the end of this article) to have them done professionally rather than risk contributing to their extinction!
Before you delve into a do-it-yourself rebuild, make certain you have a set of basic tools, a bucket of carburetor cleaner, rebuild kits (one kit per carb) and replacements for damaged parts (mixture screws, etc) that you may encounter during disassembly. There are typically two types of rebuild kits: the “Basic” kit, and the “Master” kit. The master kit includes new floats, which can develop leaks as they age. If your floats are in good shape, the basic rebuild kit will suffice, but “hammered” carburetors should get the full treatment, including new floats to eliminate the potential for problems. Note that some of the steps shown below may not be ‘required’, but if performed will result in a fine finished product, even better than new! Also, be forewarned that your engine and ignition system have to be in healthy condition. Plenty of time has been spent on fixing ‘carburetor problems’ when the REAL problem was something else! Remember that gasoline is EXTREMELY FLAMMABLE, so keep any sort of flame away from your carbs (and carb cleaner) as you work. Now, on to the fun stuff!
How to Determine if a 48 IDA Carburetor is suitable for Rebuild
| This is the Weber 48 IDA downdraft carburetor. The IDA was equipped new with 37mm venturis, but can be re-sized with venturis ranging from 32-45mm which work on engines from 1600-3000cc monsters! | 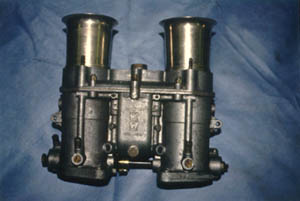 |
| This is the top side of the accelerator pump pushrod. This pushrod MUST be a snug fit at both top and bottom! This is one of the areas you should check if you are considering buying a 48. | 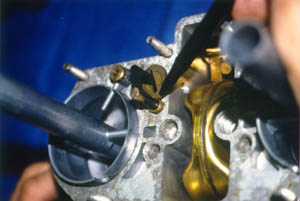 |
| This is the bottom side of the accelerator pump pushrod. You have to swing the pump cam out of the way to view it. If it’s loose when you wiggle it, run (don’t walk) away from these carbs, because the fix is more expensive than finding a good set to begin with! | 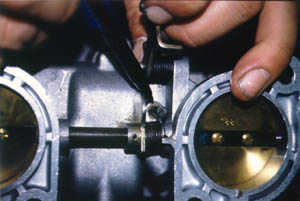 |
| This is the throttle shaft bearing location. Wiggle the shaft. This is another area that must be in good shape (snug) if you want carbs that aren’t more trouble (and cost to repair) than they are worth! Also make sure that the idle mixture screws aren’t seized (screw is on top of picture). | 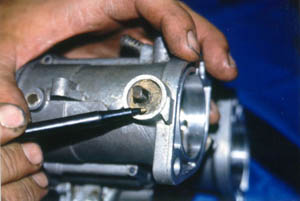 |
| The throttle shaft bearing with the leather cover removed. With the bearings exposed, look closely for dirt/grit/sand (which is bad). When loosening/tightening the throttle shaft nuts, NEVER hold the OTHER end of the shaft to stop the shaft from rotating (it twists the shaft). Always hold on the same end of the shaft you are tightening or loosening the nut! | 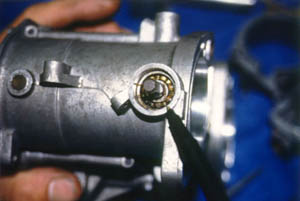 |
Steps to Rebuild your 48 IDA Carbs
| Disassemble the carbs (leave the throttle shafts and bearings in place), and put all metal parts into the carb cleaner (the cleaner will dissolve any non-metal items!). Make SURE you observe and remember (or note) exactly how the carb comes apart, because YOU have to put them back together! If you aren’t sure, you might trying disassembling one carb at a time, and use the other carburetor as a reference. The carb bodies will also get cleaned in the carb dip, but we are going to make a few improvements to them first. | 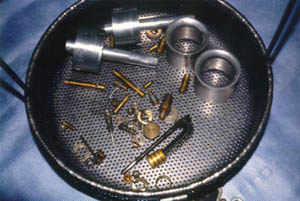 |
| Take the carb bodies and blast them in a blasting cabinet, with a special mild abrasive (silica or sand will RUIN the carbs, so don’t use it!). This gives the old carbs a brand new appearance! See the difference? (Top is blasted, bottom is not).These carbs were nasty looking before, complete with gas stains from leaky gaskets and lead plugs. | 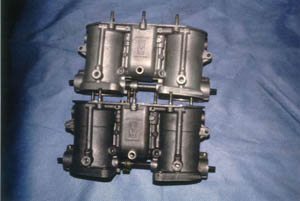 |
| This set of carbs is getting the “Third Progression Hole Modification”. We recommend this modification to IDA’s that are going to be used on street engines, since it makes them significantly more drivable. This carb is jigged up and is ready for drilling; the card is there to make the drill bit easier to see. | 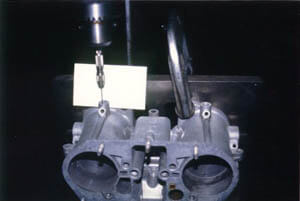 |
| Most IDAs only have 2 progression holes in them, which makes them more “off/on” in operation. Late IDA’s had the third hole when new. Here’s how the Third Progression Hole Modification will look after it’s done! (We are shining a flashlight down the venturi). The top hole is the new one you are adding. | 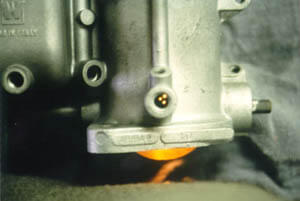 |
| IDA Auxiliary Venturis (the tall thin stacks) can become loose as the carbs age (rattling from your carbs is not normal or desirable!). An optional modification is to drill and tap the stock location for a nice Allen set-screw. This makes for a more secure method of keeping them in place. | 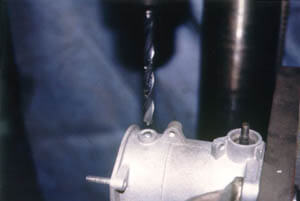 |
| Be sure to use “blue” Loctite (or equivalent) on the Allen set-screws. Otherwise the screws may back out from normal engine vibration. | 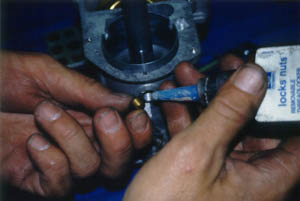 |
| This is the spring-key that normally holds the Auxiliary Venturis tight. The spring gets soft over time and cannot be easily replaced or fixed. This is why we recommend and are demonstrating the installation of the Allen set-screw system. | 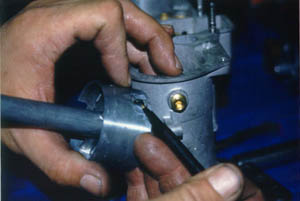 |
| Next, drill out the lead plugs on the lower part of the carb body. Experience has taught us to pull these plugs out for a thorough cleaning. | 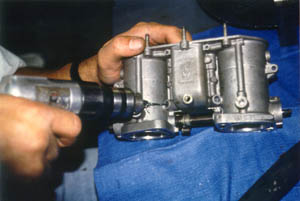 |
| Carefully thread a puller into the lead plugs, and with a POP, out they come! Careful inspection reveals a LOT of dirt and sand in the bottom of this passage! This is very common, and merely dunking the carbs into a tank of cleaner wouldn’t have gotten this debris out! | 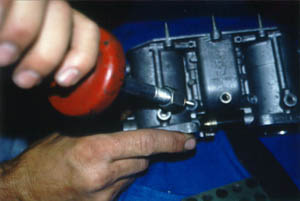 |
| Use a soft brush in the parts cleaner to clean the crap out of the bare carb body. | 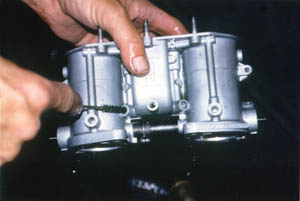 |
| After the carb body is clean and dry (blow it out with compressed air), the opening is closed again by peening some lead back into the hole. Another optional step is to mill the location flat again for a pristine, better-than-new appearance. | 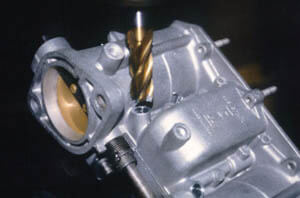 |
| The Idle Air Jet Holder is TIG welded closed, so that it can be re-drilled to the size needed. In Art’s experience, the Idle Air Jet Holder is one of the keys to unleashing the IDA’s tunability. The Idle Air Jet Holder should be sized to the application and engine size. Sizing makes a HUGE difference in idle and off idle performance. Try a 110-115 on small engines, and 130-135 on large ones (they come with a 120). | 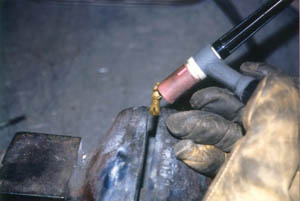 |
| The carburetor’s venturis are chucked into a lathe, and some fine sandpaper or a Scotchbrite pad are used to smooth and polish the bore of the venturi. This improves the flow through the carb (and besides that, it looks cool!) | 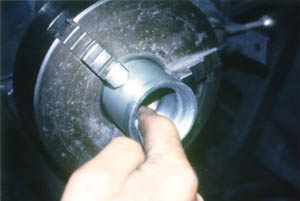 |
| This is a side-by-side comparison of a polished and unpolished venturi. | 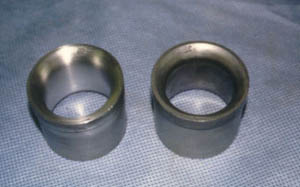 |
| You are ready to reassemble! Now that the carb parts are completely clean, blow them dry with compressed air. Then, pack the throttle shaft bearings full with a good, thick grease. Better to use too much than not enough! | 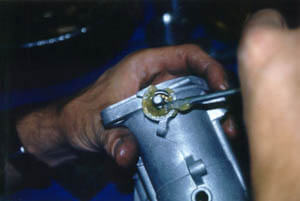 |
| Grease up the accelerator pump pushrod, and insert this into the carb body. IDA’s use a piston activated accelerator pump, instead of a diaphragm type as is used on the IDF series of Webers. The piston style is better because it is less prone to problems or wear. | 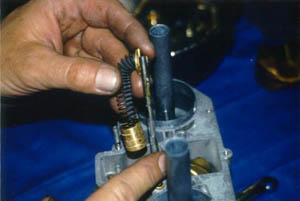 |
| The carb top gasket is placed on the carb; be sure the orientation is correct (it only goes on correctly one way). A thin coating of Chap-Stick will keep the gasket from sticking if you ever have to remove the carb top again. Get some extra carb top gaskets so you have some around if you tear one. | 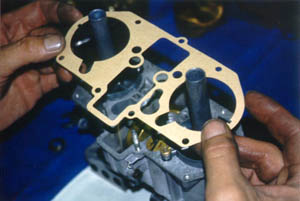 |
| The carb top is surfaced flat on a belt sander. Uneven or warped carb tops are the source of many ‘mysterious’ carb leaks! Surface the carb top until you are getting an even pattern on the sealing surface. | 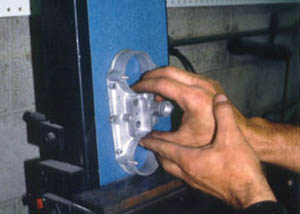 |
| The float valve (needle valve) is installed into the carb top. | 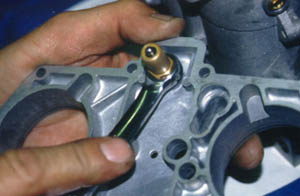 |
| The float is set to an initial setting (your best guess – you’ll adjust it later), and then installed into the carb body. | 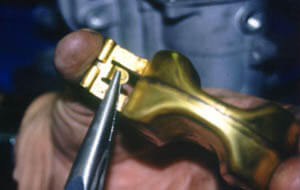 |
| Using a float-measuring tool (specific to the IDA), check the float level. You need to check both open and closed positions, and set them according to the Weber spec (Between 5.5-6mm). You can use calipers for this measurement, but the proper tool is much easier! | 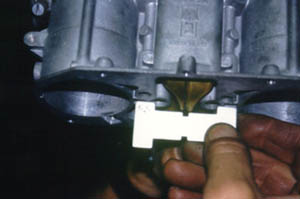 |
| Once the float is adjusted correctly, you can finish tightening down the float pivot bolt and washer. Here, the bolt is safety wired so it won’t come loose (which would leak gasoline and create a fire hazard). | 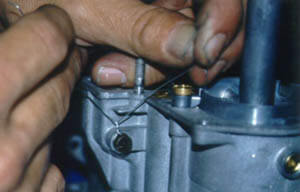 |
| The accelerator pump jets are drilled to the size that’s correct for the application. Proper tools are critical for this step! When you are dealing with sizes this small, a little difference can make or break your tuning! Again, sizing depends on the application. | 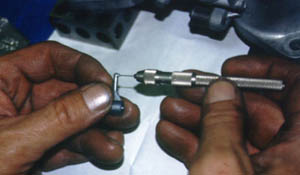 |
| The accelerator pump squirters are installed, and as they are activated, the gasoline should squirt directly at the gap between the throttle blade and the edge of the carb body. This aiming is very important! | 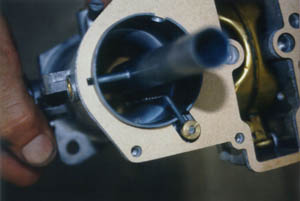 |
| The carb top is installed and tightened up. IDA’s used different types of studs/screws on various parts of the carb, depending on when they were produced. Some “sets” have mismatched components. We keep a full inventory of small Weber parts if you need them. | 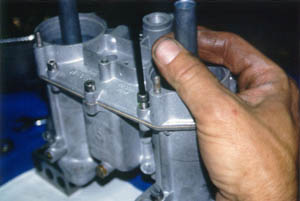 |
| This is a comparison between an old and new idle mixture screw. Old ones are often pitted (from corrosion), bent (who knows why?), or have a groove worn in the tip. Any of these conditions require new screws to bring back the idle tunability we need! Of course, we have these too! | 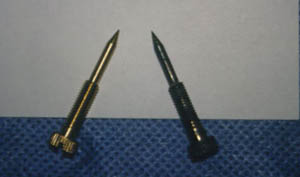 |
| The idle mixture screws, and their springs, are now installed. LIGHTLY bottom them out, then back the screws out 2 turns for a preliminary setting. | 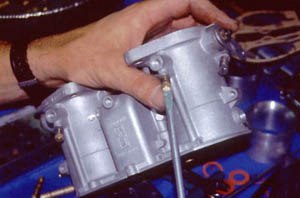 |
| Here’s another often overlooked part of carbs; the jet seating area! We used a magic marker to mark the main jet sealing area, then tightened the main jet stack (air jet, emulsion tube, and main jet) into the carb body. | 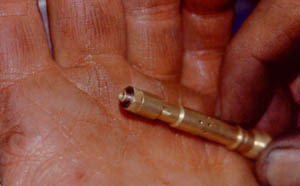 |
| Taking it back out, you can see where the jet touched the carb body. You should see a clean circle around the jet. If not, remove the jet stack, and look down into the hole (you’ll need a flashlight) to see if the sealing area is smooth. If not, it needs to be resurfaced. If the main jet does not seal, fuel goes AROUND the jet instead of through it (there goes your tuning out the window). | 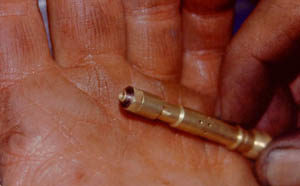
|
| Next, lubricate the accelerator pump pushrod and the cam & roller mechanism with a good long lasting lube. We recommend our new Amsoil lube. | 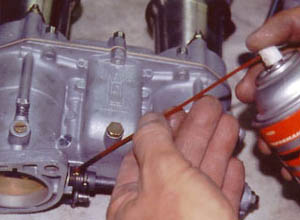 |
| Many annoying carb problems are caused by DIRT. We have shown you these filters and carb caps, many people aren’t aware they are available. On the left are some foam screens which fit tightly on the velocity stacks, and on the right are carb covers (to keep dust, gravel, and other stuff out. (Some wiseguys like to throw pennies and stuff into open carbs, so covering them up is a smart idea). | 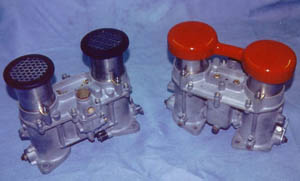 |
| Here are the finished carbs! Notice the texture of the carb bodies (compare them to “before”). Also take note of the screens on the jet stack area. These should be left off for tuning purposes (they get in the way for lots of jet changes), but once you dial your carbs in, put them on to keep the carbs free of debris that might accumulate and sully your performance! | 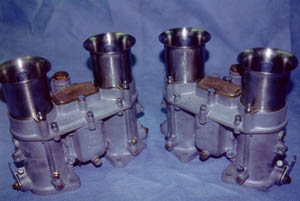 |
The photos above outline the basic steps and a highlight a few tips for rebuilding a set of 48 IDA’s to like-new condition. The secret to a successful rebuild is to pay attention to details and to be a freak about cleanliness! You can achieve outstanding results if you apply patience and use the proper tools — You won’t succeed if you “gorilla” any of your carburetor’s parts in or out. If you decide that you are capable and willing to tackle the job yourself, we carry a complete line of Weber parts: Weber rebuild kits, air filters, intakes, covers, and even all the small screws, nuts, and jets you may need for your carburetors! We can also supply carbs that are still in production (Progressives, ICT’s, IDF’s, DCNF’s) if you aren’t into the rebuild thing.
Special thanks to Art Thraen, of ACE VW for his assistance to make this article possible. Art is now retired, but if you are looking for a quality rebuilder because you feel like the task of rebuilding your own Weber 48 IDAs is “over your head”, you can hire his successor Justin McAllister of Blackline Racing to do your carburetor rebuild for you.
As always, if you have VW Carburetor or other VW tech questions, email us at vwtech@aircooled.net
This is an original VW Tech Article written by John Connolly, Aircooled.Net VW Parts
photos and collaboration: Art Thraen
originally posted: January 20, 2001
last updated: 09/23/2004